Here is my process:
You need to cut the pattern out and then cut the fabric out you want to use. You can make the legs skin color, but I wanted tights so I used a pattern.
Also the sleeve and shoe pattern is on the arm/leg pattern, you just follow the line disecting the patterns.
Before we put the doll together, we need to add all the little details first.
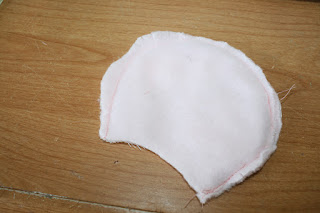
Here is the hair puff. Sew all around the perimeter. I turned the wheel with my hand the whole time because I wanted a nice curve and no angles.
I used the bottom fabric marker which I inherited from my mom, but the top fabric marker is from Walmart and works just as great.
I drew the face on a paper and traced with the fabric marker on top. If you want you could find a face you like and print it off and do the same thing.
Miss Marlie has freckles and strawberry blonde hair so we chose accordingly.
Pin the hair (We used fleece, but felt is also a good choice) and sew around the edges.
I placed and pinned the puff now, so I didn't loose it or forget it. Make sure to pin is pointing in, bacause we will turn it right side out later.
Next is to fold the shoe fabric over a little and sew the top of the shoe to the foot. Then the mary jane strap the same way as well as the back of the shoe.
I added a ruffle to the front with a scrap peice of fabric.
Sew the arms and legs right side together. Cut every little bit around the curve so it will open up nicely. Turn and press open.
Fill the leggs with a little rice or beans so the will hang and sit nicely. You don't need very much at all! Then fill the rest of the foot with fluff. Fill the arm with fluff.
The ones on the left are stuffed, the ones on the right are not. I didn't stuff them so much that they were hard and didn't move. You want it medium.
Pin the back of head(make sure it is of hair fabric) to the face right sides together and sew. Clip around the curve. Turn right side out and stuff lightly again.
I added the sleeves now and they were horrible. I gathered it and sewed it to one side and it was retarted.
So I un-gathered it and made sure it wraped the whole arm and then sewed it to the arm.
Now pin the leggs and arms on the body front.
This is where it gets tricky since it will be tight. I chose to not pin it all the way around, but sew one side at a time. So I sewed one arm side, then the bottom and the third side was tight, but not impossible. I had to take out, readjust and resew this side a few times. Clip corners and turn right side out. Fill the bottom of the body with a little rice for stability and stuff the rest of the eay up.
I machine sewed the head in the front to the body so it looked nice and professional. I hand sewed the back where the hair meets the body and you can't tell a bit. Make sure you add a little fluff to the neck before you hand sew it shut. I added a flower to the hair puff.
Then I made a little capelet with scrap fabric and then not pictured I made a necklace that doubles as a bracelet for Marlie.
I think she turned out really sweet and can't wait to make one for my little girl!!!


14 comments:
SO ADORABLE!!!!!!!!! That looks tricky, but you are so good. it is so cute. I bet she loved it.
thank you for share this, your doll is very pretty. Regards form Mexico.
Thank you !!!!
where do I print this pattern from
Never mind got it. Thank you
When cutting out the pattern, did you add a 1/4 inch seam allowance?
Hi! Just finished a doll with your tutorial and wanted to thank you for sharing it!
http://redletterquilts.blogspot.com/2014/09/miss-dolly-for-big-sister.html
Hi,
How can I print this Pattern Please?
Hi,
How can I print this Pattern Please?
A dream doesn't become reality through magic; it takes sweat, determination and hard work. See the link below for more info.
#sweat
www.ufgop.org
Hi, I'd like to print this pattern as well, but can't figure out how to do so. Could you give me a pointer? Thanks!
Very Nice Blog Post for More Information"Looking for the doll soft toy online shop, to purchase a good quality barbie doll soft toy? Check out the doll soft toy online now.Doll Soft Toy Online
This was great, except where you said the sleeve looked "retarted". I think you could find a better word.
I was waiting for that.
Post a Comment