About Me

My photo
I am a stay at home mom who finds little snippets of time to craft and create.
Powered by Blogger.

Search This Blog

Tuesday, June 26, 2012

4th of July hair pretties - Day 319

 Who doesn't need hair pretties for the 4th?!! I made these for an auction that will be held starting on Thursday of this week so if you like them you can buy them!!!!


Monday, June 25, 2012

How to clean your microwave easy peasy - Day 318

This is not my microwave, I was too embarrassed to show you mine, but it is worse than the picture. I was skeptical of this, but it is awesome! Now, what you do is pour 2 cups water into a big bowl. Add 1-2 tbsp vinegar and place in the micro. Cook it for 5 minutes. When you open it the junk will still be there, but all you have to do is just wipe it away! My turning glass didn't get clean, so I poured a little of the water on it and did it again for 5 more minutes. Then I wiped it clean.

Sunday, June 24, 2012

Key to my heart bridal shower - Day 317

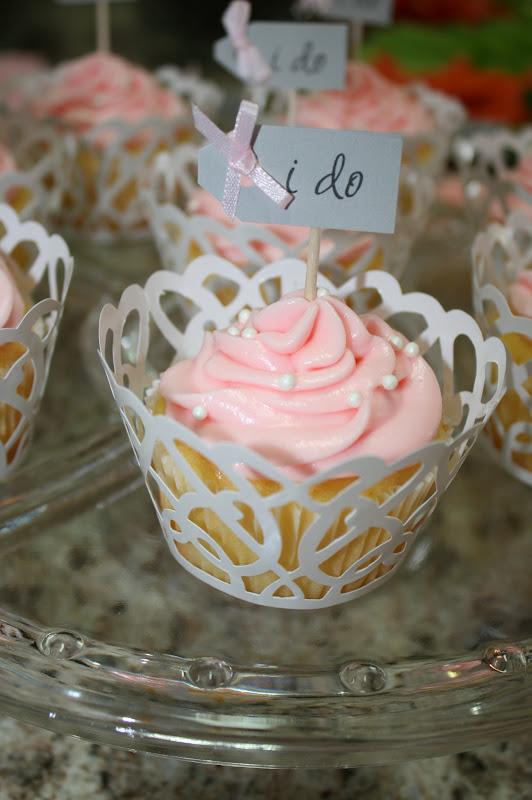
 I didn't do everything I had a ton of help for this shower! My Mother-in-Law made all the food, my sister-in-law Michelle made the cupcakes (divine!!!) and helped with games, and my other sister-in-law Sarah made the pom-poms, banner, and the prizes. My friend Shannon made the adorable favors!!!


Jessika the Bride to be!

Saturday, June 23, 2012

Bride to be crown - Day 316

I saw this really cute idea for the bridal shower a long time ago and made it right away. So this crown has been sitting, waiting for today and for me to post about how I made it. It is a little crown for the bride to be made from chicken wire and lace.


I cut some chicken wire down do about 6" wide and long enough to go all around my head and a little to tie off. The hardest part was connecting the wire so it didn't hurt the head. I had to twist every wire so it was flat going up the seam. I poked my hands a lot. Once that was done and I had a circle I took little beads and put them on the top wires that were exposed. I then took jewelery pliers and curled that wire down so it could poke. So no wires are exposed anymore. Then I cut lace and used hot glueto place it on the crown. You have to have two of the lace. One for the inside and one for the outside. Lace has holes and so doe the crown, so if you put hot glue on it and nothing is on the back, you will burn y our fingers. Ask me how I know!

Ok, so then I added little sparkly jewels all around the lace with hot glue. I had already had the white rosette and thought it was too big for my head, but it was perfect for the crown. I hot glued it on the lace seam to hide it a little.

Finally I added a little paper saying " Bride to be" with hot glue (my best friend) and it is so dang cute! I don't know if she will want to wear it, but I am placing it on her seat to save it for her. Cute huh!

Friday, June 22, 2012

Table scape - Day 315

 I am spearheading a bridal shower for my soon to be sister-in-law. I introduced you guys to the coffee filter flowers in an earlier post and I promised I would show you the finished product.

Keep in mind this on my table not at the event. I can post pics of that later. 
 

This is the tallest tier. It is always great to have different levels when making a table scape. I use dishes under neath a table cloth. I think the tallest was my trifle dish. I made coffee filter flowers and placed them in my vase. I used scrabble tiles to spell "Bride to be" although it looks like my "E" fell off in the pic. I also took books and wrapped them in white paper to make them look uniform and wrapped twine to keep them together. I added ribbons and a little charm and this level is done!

This is the second level. It is on top of a cake stand. I made another filter flower and placed it on top of a candlestick. There is a jar of clothes pins for a game and a little frame with a 3D butterfly for fun. I also placed a scrabble tile at the base of this tier for dimension. Key to my heart is the showers theme. 

This level is the table level. I have yet another filter flower and a little dish with pens for advice. The vase in the back will hold the advice when written on. I made keys in pink paper for the advice to be written on.

Notice there was one thing that tied it all together...the table cloth. There has to be some unity to connect all the levels and make them make sense.

Thursday, June 21, 2012

New tv - Day 314

Daniel and I have been holding out for a really long time to buy a new t.v. We thought it was a luxury to get a nice new flat screen. We have been using a box t.v. since we were married. This most recent one Daniel got from a resort for $30. It has worked great and why would we need a new one if the one we have is great.

Daniel and his brothers were looking at t.v.'s one guys night and it started this man hunt for the best deal for the biggest t.v. they could find. Daniel found that Walmart sells refurbished t.v.'s at a discounted price. So I said I was ok with buying it if we count it as his Fathers day present AND our anniversary gifts to each other. Thank goodness he found a screaming deal.
 The next thing I know there is this huge box on my porch. It looked huge! I had to wait for Daniel to get home to help, cause I couldn't lift anything up and out of the way. 

old t.v.

I woke up the next morning to big screen bliss! It is absolutely amazing. It makes it so much sweeter having had waited so long for one. The boys get so much fun out of the new big t.v. too.


 Look how thin it is!

Wednesday, June 20, 2012

Bento box - Day 313

 Aren't they so cute! 


I recently stumbled upon this art of the Japanese lunch box called Bunto box. The Japanese take pride in their arts and lunch is no different. I thought I would try it out to see if it helped the boys like their food better. It helped a little. Maybe it was my presentation and I will only get better!

You start by making the dish pretty with lettuce or some kind of green. They have real fancy plastic lettuce for the lunch boxes if you want.  You are supposed to separate anything that doesn't mix taste wise.

I used sticky rice and a sandwich bag  to make the ball form. twist it tight and it will make a ball. A few minutes will all it take for the ball to form. Sticky rice is a special rice. I couldn't find the name sticky, so I used sushi rice and it worked great.

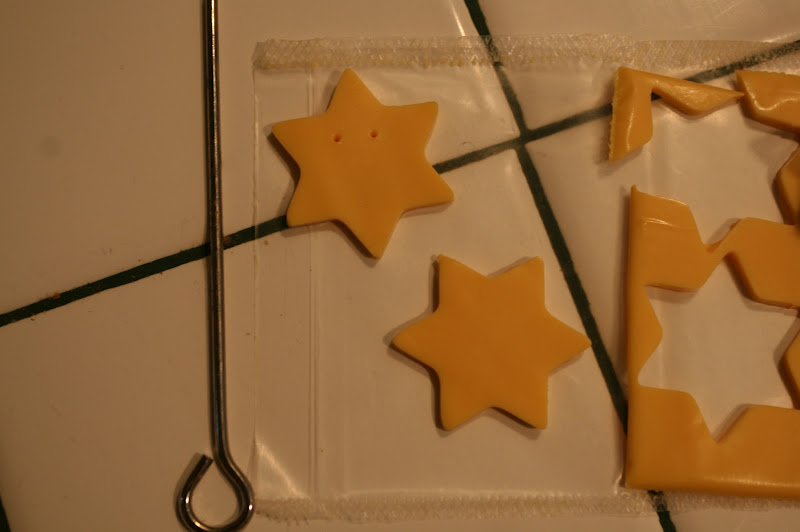
I used my itty bitty cookie cutters to make a star shape to put on top of the rice. 

I used a metal pick from my candy thermometer to make the eyes and the mouth. The videos I watched they use small coffee straws. 

 Here is the finished product. I poured soy sauce on the balls after I gave it to the boys. The rices was still hot so the cheese metled to the balls.

I also included cherry tomatoes, sausage, and broccoli. 

Tayrien ate everything like usual. Ben ate most of it.